Twisted Wonderland Ita Bag Layout Inspiration
Table of Contents
Twisted Wonderland, the phenomenally popular mobile game developed jointly by Disney and Aniplex (TWST), has sparked a sustained wave of creativity across the global ita bag community, thanks to its distinctive Night Raven College setting, its characters who blend gothic elegance with villainous charm, and its highly collectible merchandise.
TWST merch itself carries a strong sense of ornate, elaborate flair paired with a disciplined academy aesthetic. That means a TWST-themed ita bag is never simply a matter of filling the window with pins — it’s a comprehensive art involving color control, spatial layering, structural support against gravity, and rebuilding the atmosphere of the game’s world. This article will walk you through TWST’s aesthetic logic in depth and, using real examples, give you a highly practical, complete guide to building your board.
The Aesthetic Core of the Dark Academia Look: Three Design Frameworks for a TWST-Themed Ita Bag
Unlike common pastel sweet-style ita bags, TWST’s color palette is inherently dark gothic, vintage academic, and mysteriously magical in tone. To put together a professional, visually striking TWST-themed ita bag, you need to deeply understand the following three core design frameworks.
1. Strict Coordination and Complementary Use of Dorm Colors
Each of Night Raven College’s seven dorms has a tightly defined color identity system. Dorm colors don’t just determine which main pins you choose — they also directly determine the board background fabric, trim lace, and the backing’s color scheme.
Heartslabyul: the primary colors are crimson and pure black. Bright gold and snow white are recommended as accent colors. Materials should evoke royal leather, velvet, and a playing-card texture.
Savanaclaw: the primary colors are yellow ochre, muddy brown, and caramel. Black, bronze, and animal print are recommended as accent colors. Materials should lean toward matte leather, rugged suede, and a diamond-cut texture.
Octavinelle: the primary colors are deep-sea grayish purple, azure blue, and dark green. Pearl white, silver gray, and ice blue are recommended as accent colors. Materials should emphasize satin sheen, shimmering velvet, and shell-like iridescence.
Diasomnia: the primary colors are fluorescent/toxic green and jet black. Dark silver and deep purple are recommended as accent colors. Materials should include hard leather, metal buckles, and gothic lace.
Scarabia: the primary colors are golden yellow, dark red, and jet black. Turquoise blue, bright gold, and sandy brown are recommended as accent colors. Materials should emphasize exotic brocade, pure gold tassels, metal fittings, and a desert-dune texture.
Pomefiore: the primary colors are deep purple, noble gold, and pure black. Snow white, deep red, and silvery purple are recommended as accent colors. Materials should aim for luxurious velvet, delicate lace, crystal-cut facets, and a vintage mirror-frame texture.
Ignihyde: the primary colors are ice blue, fluorescent blue, and dark grayish black. Pure white, metallic silver, and electric blue are recommended as accent colors. Materials should highlight translucent acrylic, glowing tech-style pieces, carbon-fiber texture, and mesh fabric.
2. The Grid System and Gothic Symmetry
Yana Toboso’s design style is heavily influenced by Victorian Gothic, with a strong emphasis on symmetrical beauty and geometric framing. When laying out your board, you can build visual order through diagonal symmetry, a radial arrangement from the center, or a grid-like framework. A well-ordered layout naturally conveys the feel of academic discipline and rigorous magic, giving a major boost to the overall quality of the piece.
3. Layering the Board into Foreground, Midground, and Background
Many hobbyists’ boards end up looking flat or cluttered, and the root cause is that all the merch is fighting for attention on the same single plane. A great board needs to build three distinct layers of depth.
Background: dorm-colored velvet backing fabric, gold- or black-based lace, embroidered patches, or playing-card/patterned print paper.
Midground: the core array of metal pins, ita cookies/discs, main color paper, and cards.
Foreground: charms placed close to the clear window, small 3D pendants, artificial flowers, edge-pressed lace trays, and charms hung on the outside of the bag.
In-Depth Breakdowns of Real Community Examples: Drawing Inspiration from Top-Rated Boards
We’ve picked three especially iconic real-world TWST ita bag examples and broken them down comprehensively in terms of composition, material choice, and practicality.
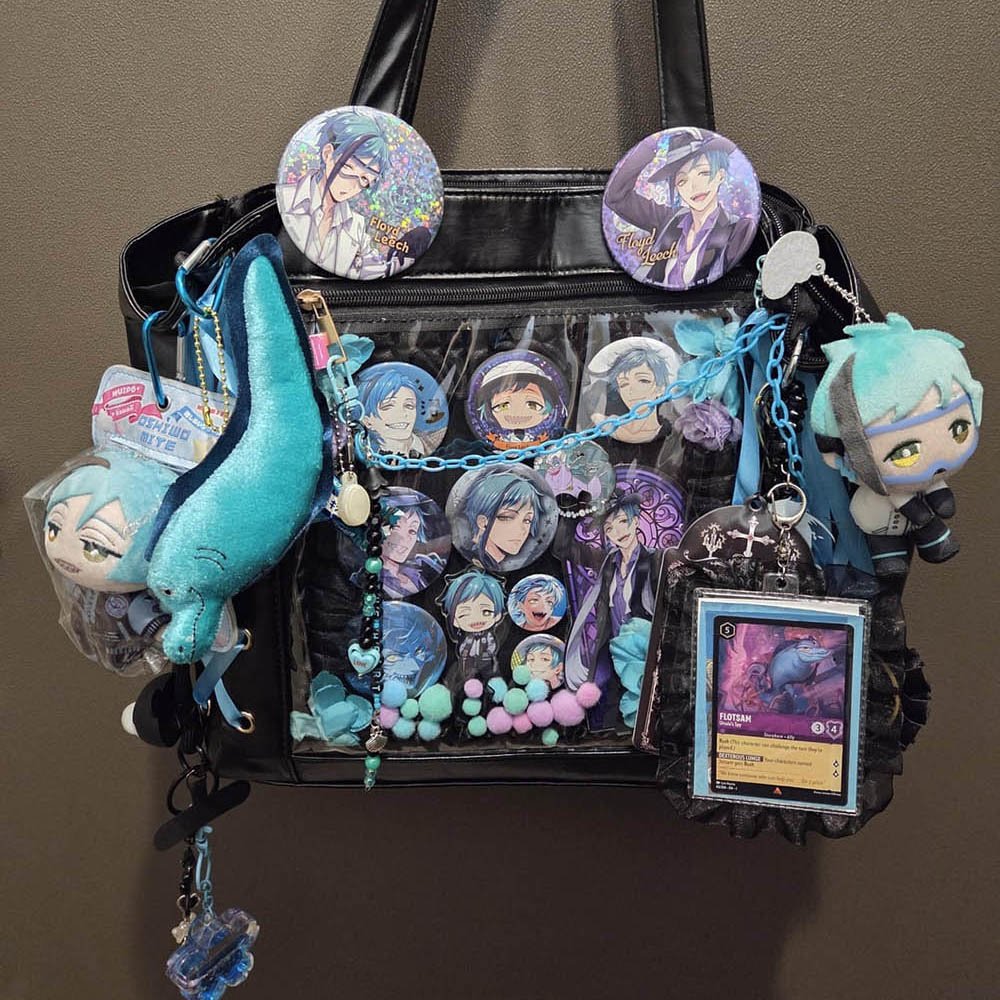
Case 1: A Minimalist Octavinelle Tote with an Ocean-Themed External Display
Theme: Floyd Leech
Case Overview: a typical black tote ita bag. The board inside isn’t crammed with merch — instead, it uses tri-color small pom-poms as the base layer, paired with several round Floyd pins and Polaroid-style cards. What really stands out is that the exterior of the bag is hung with a rich mix of plush and ocean-themed elements: on the left hangs a large Floyd diving-suit flatoon plushie and a light-blue dolphin plushie; on the right hangs a diving-suit flatoon plushie; the bottom right even has a bordered trading-card protector holding a special card; up near the base of the handle, two large pins are attached, and in the middle hangs a light-blue charm that ties the whole clear window together.
In-Depth Layout Analysis
Visual focus extending inside and out: the board interior is dominated by blue-purple toned pins, with light blue and pink-green pom-poms filling the gaps at the bottom; on the outside, the display space is extended using the top, both sides, and a card at the bottom, giving the whole thing a strong, dynamic ocean atmosphere.
Reorganizing oddly shaped and plush charms: the creator cleverly used the D-rings and zipper loops on the sides of the bag to hang the heavier, bulkier dolphin and flatoon plushies on the outside of the bag, solving the problem of limited space inside the clear window.
Practical pitfalls and tips: pins clipped onto the handle at the top are very prone to falling off from friction as you carry the bag, so when hanging a lot of plush items on the outside, use high-strength D-rings to prevent charms from accidentally getting lost while you’re out at a convention.
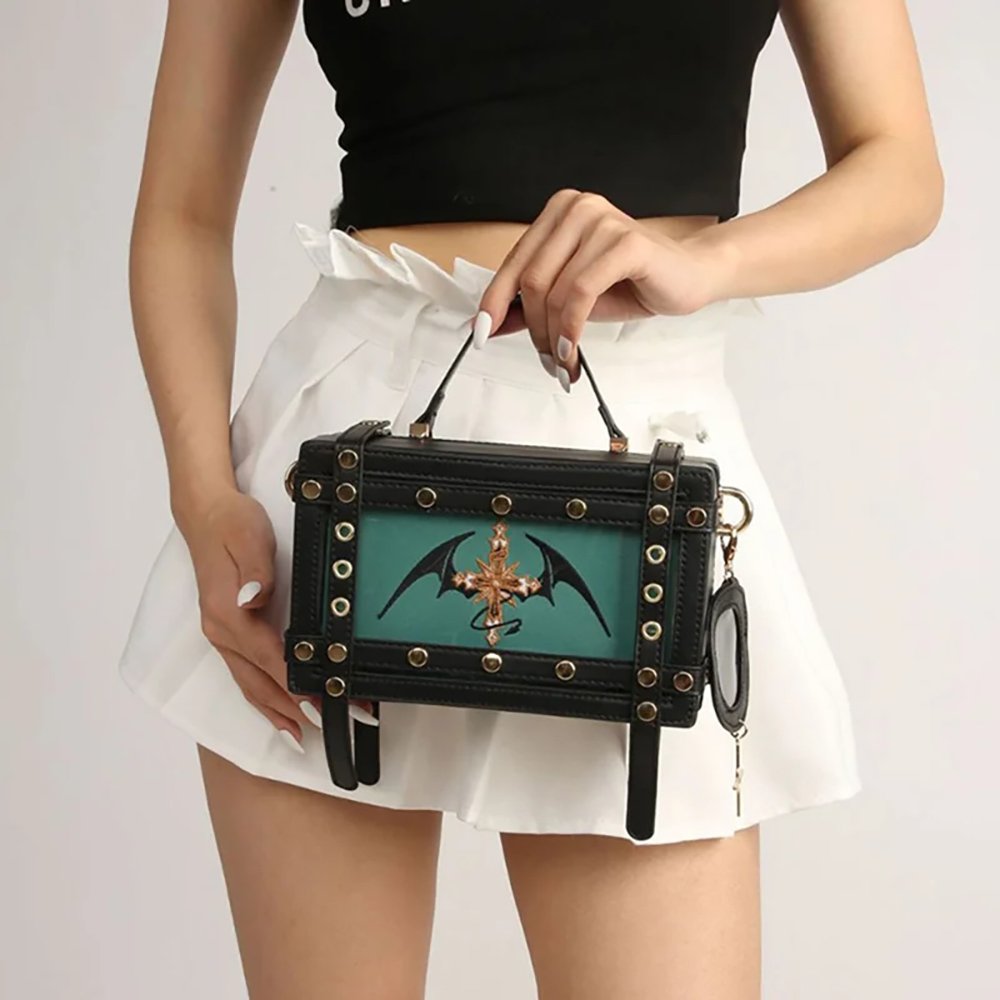
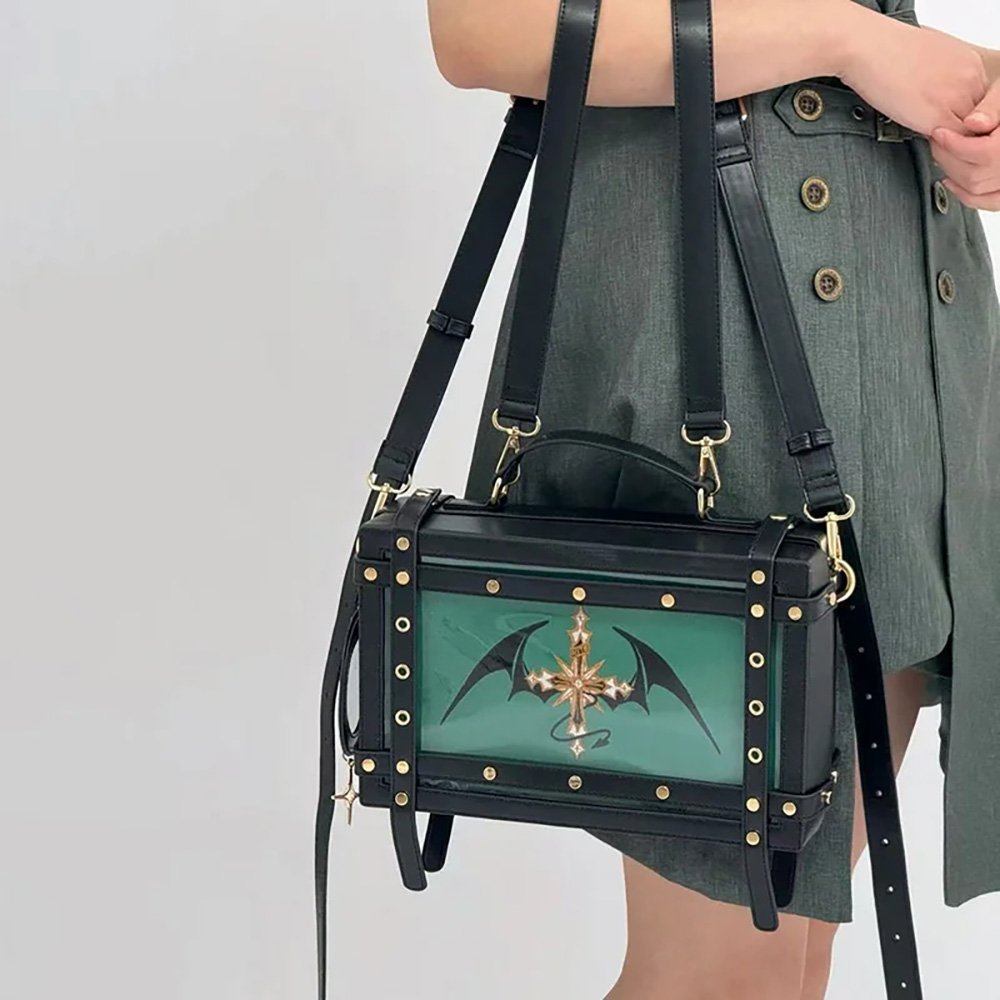
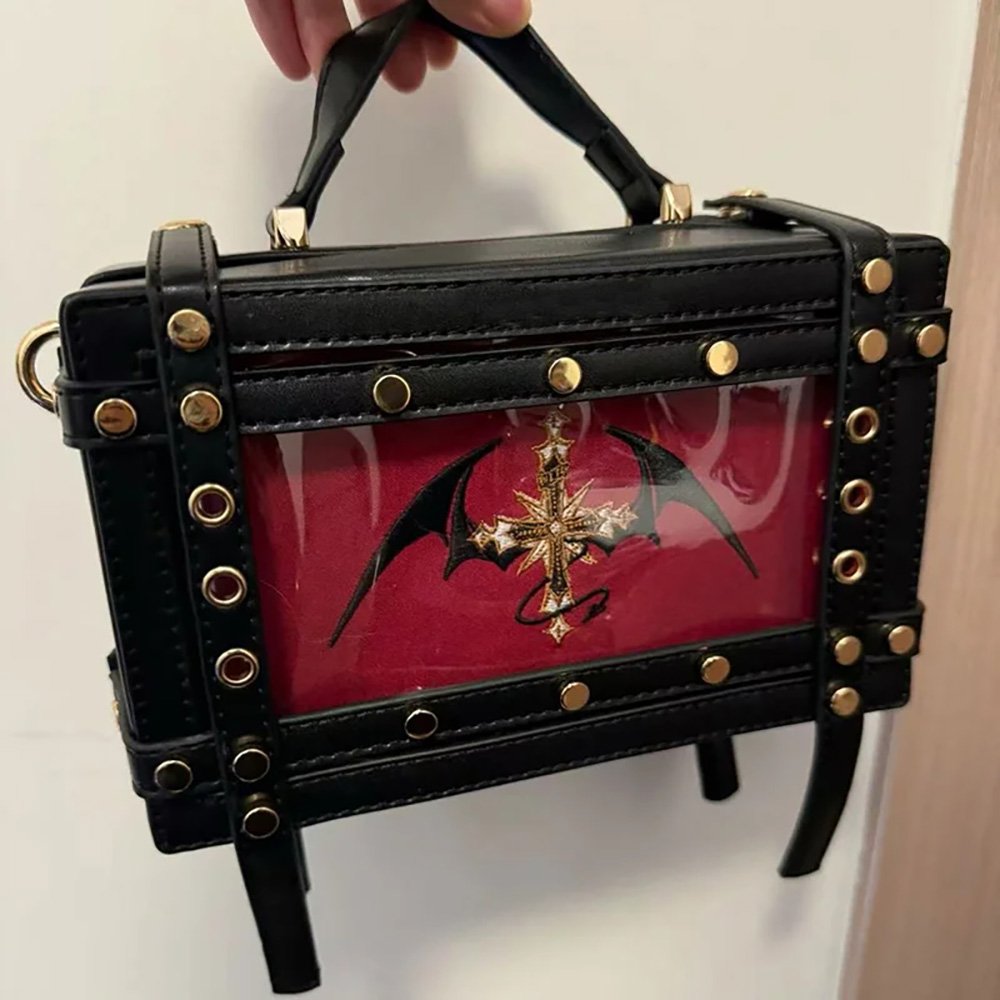
Case 2: Mixed Four-Dorm Layout and Irregular Sectioning on a Coffin-Shaped Ita Bag
Theme: Multi-Character TWST Mix
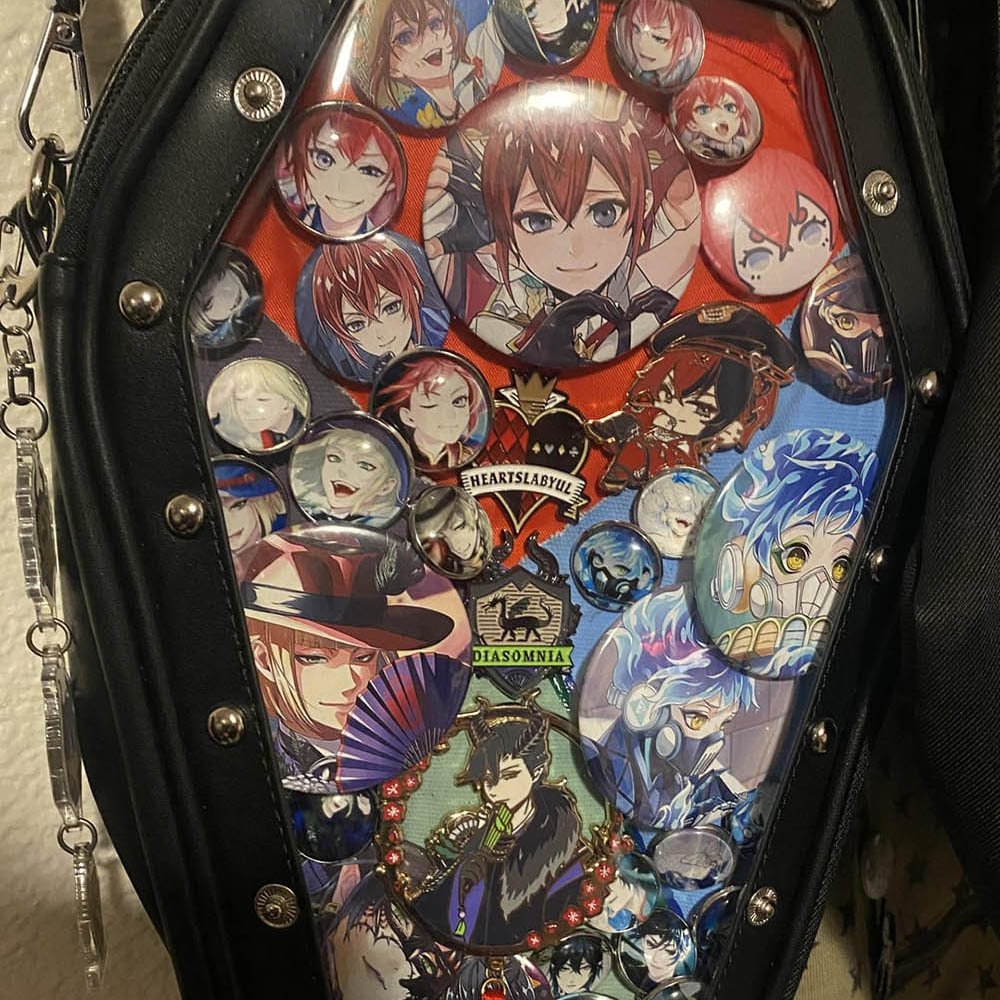
Case Overview: a rigid black leather coffin-shaped ita bag that fits TWST’s world perfectly, with metal stud trim along the edges. The clear window inside is packed to the max and laid out in four dorm zones — red on top, purple on the left, blue on the right, and green on the bottom. The top is Heartslabyul, with Riddle as the focus; the left-center is Pomefiore, centered on Rook; the right is Ignihyde, centered on Idia; and the bottom is Diasomnia, centered on Malleus. At the point where the four zones meet, metal dorm crests for Heartslabyul and Diasomnia are embedded as a natural divider.
In-Depth Layout Analysis
Four-quadrant color zoning: the creator precisely divided the coffin-shaped board into four color blocks. Red on top, deep purple on the left, ice blue on the right, and dark green and black on the bottom create a striking color clash, while the metal dorm crests in the middle act as a visual buffer, so the borders between the different color zones don’t end up looking messy.
Making use of the coffin shape’s tapered lines: the coffin bag is narrow at the top, wide in the middle, and tapers at the bottom. The creator placed the largest core pins in the wider area right at the top, while the left-center and right sides use medium-sized color paper and large pins to fill out the wide edges, and the tapered bottom area is packed with standees and small pins, creating an extremely full, dense display.
Practical pitfalls and tips: the original poster mentioned in the comments that because the coffin window’s frame blocks a fair amount of the edges, many small pins ended up partially hidden. When using this kind of multi-zone, irregularly shaped ita bag, it’s best to place each color zone’s main focal pieces strictly within the center of the area the window actually exposes.
Case 3: Heartslabyul Red-and-Black British Plaid with a Combined Plushie-Doll and Pin Layout
Theme: Riddle Rosehearts
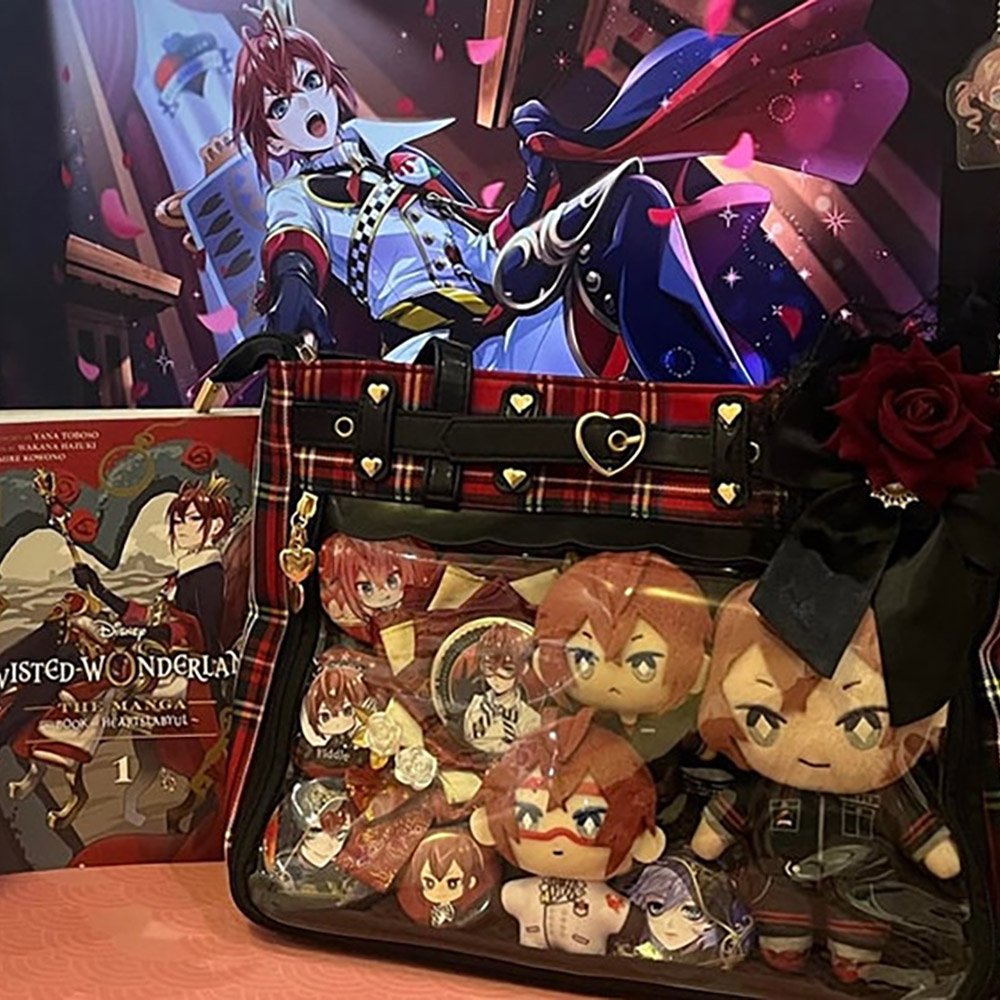
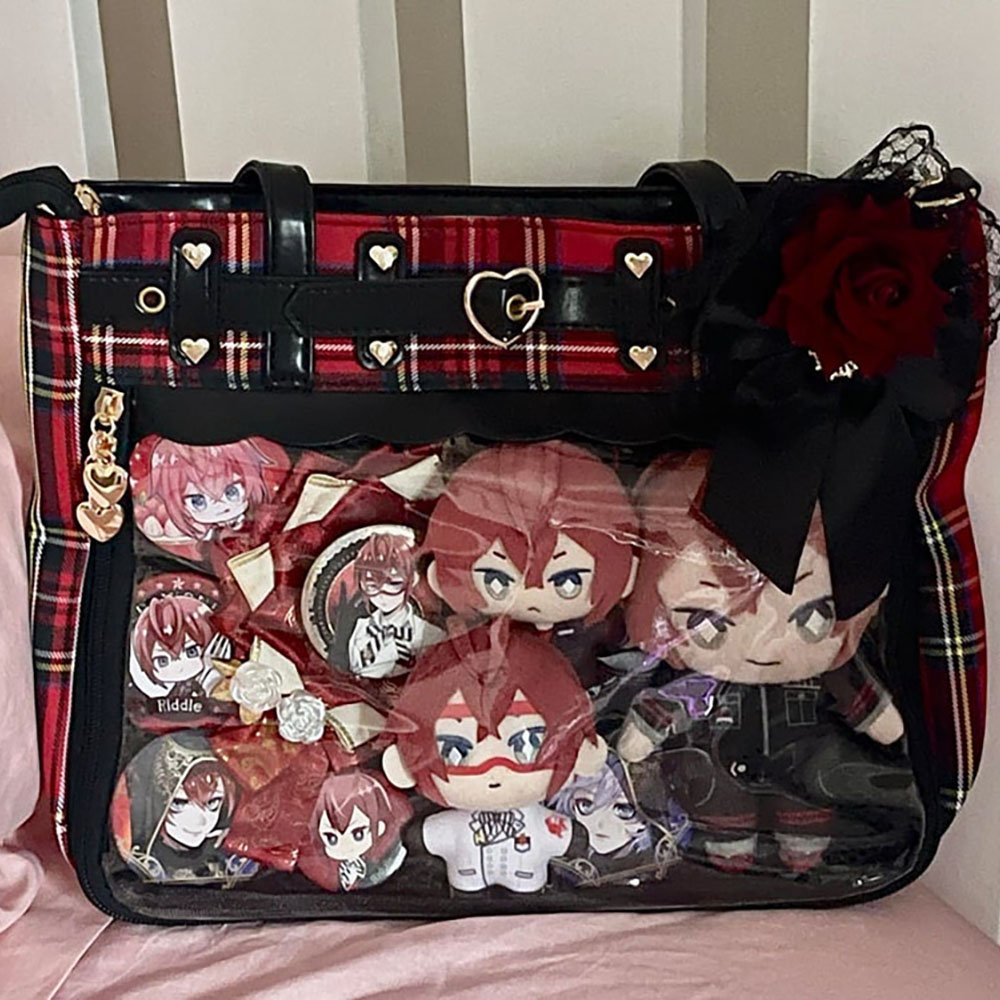
Case Overview: The bag itself is done in a red-and-black British Scottish plaid, with a gold heart buckle and black belt trim on the handle and edges, and a large black-lace fabric red rose hanging on the outside of the top-right corner. Inside the clear display window, the layout is asymmetrical — a pin tray on the left, plush dolls on the right: the right side holds two differently posed Riddle plushie dolls in a sitting position plus one flatoon plushie; the left side is wrapped in lace trim and a ribbon-bow tray holding multiple Riddle pins.
In-Depth Layout Analysis
A strong match between the bag’s texture and the character: the plaid fabric directly echoes Heartslabyul’s playing-card and British academy style, and the big red rose accent on the top-right corner is the finishing touch, pulling the atmosphere together without needing much extra lining.
Combining 3D and flat elements at offset heights: on the right, the thickness of the plushie dolls fills out the clear layer, while on the left, a red ribbon and small white rose tray raise the pins up, creating a staggered, three-dimensional look that blends plush dolls and flat metal pins perfectly within a single window.
Practical pitfalls and tips: filling the window with 3D dolls uses up a lot of depth, so if the pins on the left aren’t raised with multiple layers of backing, they’ll sink into the background and look dull. It’s best to pad underneath the pins with EVA foam to keep the visual height even on both sides.
A Four-Step Practical Process for Building a TWST Character Display Board
Step 1: Measuring and Stiffening the Insert Board
Never pin directly into the soft fabric that comes built into the bag. Follow the standard process below to prepare your board.
Use a soft measuring tape to precisely measure the interior length and width of the bag’s clear window.
Get a 2mm-thick sheet of EVA foam board or PVC mesh board and cut it to size.
Wrap the surface of the PVC/EVA board with velvet or trim fabric matching the dorm color, and secure it tightly on the back with double-sided tape or fabric glue.
Step 2: Determining the Focal Point and Test-Placing Your Pieces
Lay the board flat on a table and don’t rush to pin anything down or glue it yet.
Place your most important, largest, or most artistic piece at the center point or at the upper third of the center axis.
Take a photo straight from above with your phone and check whether the overall visual weight feels off-balance.
Once you’ve settled on pin placement, use a mark-free water-soluble pen to make tiny marks on the backing fabric.
Advanced tip: when securing heavy metal pins, pushing the pin straight through the fabric can cause the fabric to pull and dent over time from sustained gravity. It’s better to use a wrinkle-resistant display insert accessory — attach the pin backs to a rigid mesh first, then slot that into the insert board’s channel. This keeps the board perfectly flat even under 2kg of merch.
Step 3: Filling Gaps and Building a Gothic Atmosphere
Once your pins are all secured, there will inevitably be gaps left between them. Fill these gaps using small TWST-specific props to build the mood.
Lace and trays: fit your core pins with black or gold rigid lace pin trays for an instant boost of royal, aristocratic feel.
3D florals and metal pieces: use a hot glue gun to attach artificial red rose heads, small dry branches, black feathers, crossed metal swords, or gold chains into the empty spaces around the edges.
Step 4: Assembling the Board into the Bag and Matching an External Charm System
Slide the finished display board smoothly into the bag’s window and zip it closed. Finally, decorate the outside of the bag: hang gold-foil ribbon strings or metal charms in the matching dorm color from the strap or the side D-rings, so the inside and outside of the bag echo each other.
Turning Your Love Into Your Own Personal Magical World
Building a successful TWST-themed ita bag was never just about piling up quantity — it’s a spatial reimagining that deeply combines the official aesthetic with your own personal love for the characters. From precisely capturing the colors of the seven dorms, to splitting the space into foreground, midground, and background, to a solid structural core that resists damage and denting, every detail tells the story between you and your favorite characters.
Whether you prefer a rigid, military-precise grid arrangement or you’re drawn to a rich, densely packed gothic-vintage style, once you’ve mastered these two core rules — dorm-color coordination and gravitational balance — you can build your very own little piece of Night Raven College within that small clear window.
Get your board, your lace, and your most treasured merch ready, and start your own TWST board-building journey!
FAQ
How can splitting the layout into foreground, midground, and background keep an ita bag from looking cluttered or flat?
Build a rich visual effect by constructing three distinct layers: the background layer uses dorm-colored velvet backing, lace, embroidered patches, or playing-card/patterned print paper as the base; the midground layer holds the main visual elements — the core array of metal pins, ita cookies/discs, main color paper, and cards; and the foreground layer, positioned close to the clear window, adds small 3D pendants, artificial flowers, edge-pressed lace trays, or charms hung outside the bag.
When displaying flat pins and 3D plushie dolls together, how do you keep everything visually level?
Since 3D dolls take up a lot of depth, the flat pins next to them can end up looking sunken and dull. The fix is to pad underneath the pins with multiple layers of EVA foam, or raise them up with a ribbon tray, so the flat pins and the 3D dolls sit at the same height.
Heavy metal pins can pull and damage the backing fabric over time — what techniques help prevent that kind of damage and denting?
Never pin directly into soft fabric — use a 2mm-thick sheet of EVA foam board or PVC mesh board as a rigid insert board instead. It also helps to use a wrinkle-resistant display insert accessory: attach the pin backs to the rigid mesh first, then slot it into the insert board’s channel. This effectively prevents the fabric pulling and warping caused by sustained gravity.
What can you use to fill in the empty grid spaces left after your pins are placed?
You can fit your core pins with black or gold rigid lace trays for an instant boost of gothic, aristocratic flair, or use hot glue to attach 3D florals and metal accents — like artificial red rose heads, small dry branches, black feathers, crossed metal swords, or gold chains — into the empty gaps.
Get Inspired on Instagram
Looking for inspiration for your next ita bag? Follow us on Instagram for more ita bag decoration ideas, styling inspiration, and creative ways to showcase your favorite pins, charms, and collectibles. We regularly share different styling ideas to help you discover new ways to decorate and personalize your ita bag.